In this article, We will learn about the Email to Case feature in Salesforce and how it works.
Table of Contents
- What is Email to Case?
- Enable Email-to-Case setup
- Add Routing Addresses for Email-to-Case
- Email System Forwarding with Email-to-Case
- Test Email to Case Functionality
What is Email to Case?
Email to case is one of the best Salesforce features for quickly resolving client email inquiries. If we enable this feature, Salesforce converts all customer emails to cases. when customers send messages to support email addresses.
Enable Email-to-Case setup
As we know, the Email to Case feature works when we enable it. Follow the steps given below to do so.
- From Setup, enter Email-to-Case in the Quick Find box.
- Click on Edit
- Select Enable Email-To-Case and On-Demand Service then click on Save.
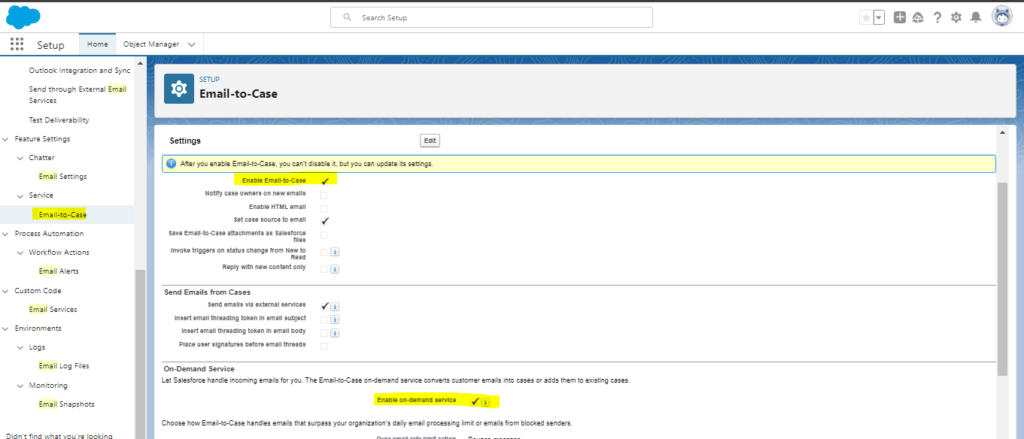
- The on-demand service setting allows Salesforce to handle all incoming emails. The Email-to-Case on-demand service converts customer emails into cases or adds them to existing cases.
Note: Enabling Email-to-Case generates the Send Email quick action. You cannot disable Email-to-Case after you enable it, but you can edit the Email-to-Case settings.
Add Routing Addresses for Email-to-Case
Routing Address: The emails that need to be turned into cases are specified by the route address’s email IDs. There can be a multiple routing addresses for organisations. A case is created when the email address you specify is listed in the To, CC, or BCC fields of a customer email.
- Click on New Button in the Routing Addresses list

- Enter any name you wish for the Routing Address in “Routing Name” and your existing email address in “Email Address” where customers can contact your support team. This email address will direct communications to Salesforce and turn them into cases.
Routing Name: The route Address’s name, When an agent emails a customer from this email address, this name is displayed in the From field.
Email Address: The incoming email address for this Email-to-Case routing address. Emails sent to this address generate cases. The email address must be unique.
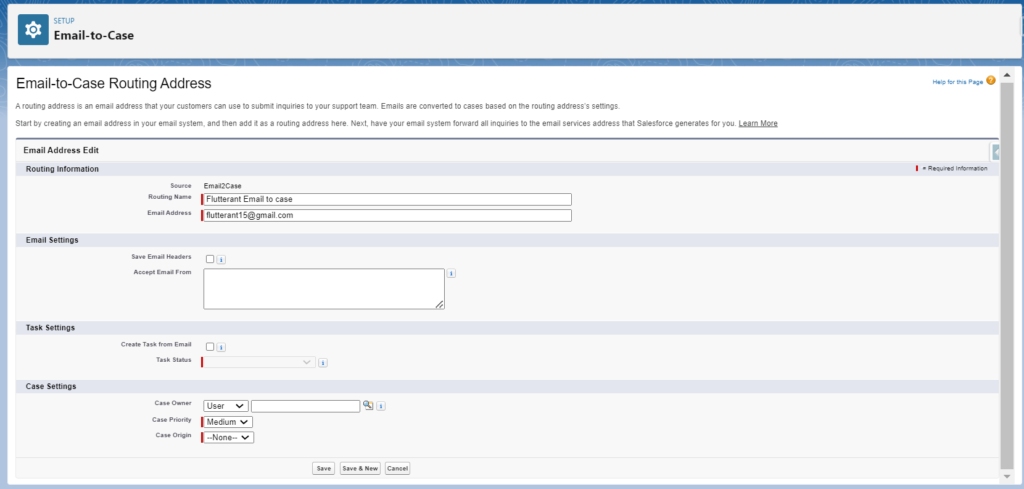
- We can specify the Case Owner, though it’s optional. the Case Priority will be “Medium” by default, and give the Case Origin as “Email.”
- Click on Save. A confirmation email is sent to the routing email address that you provided
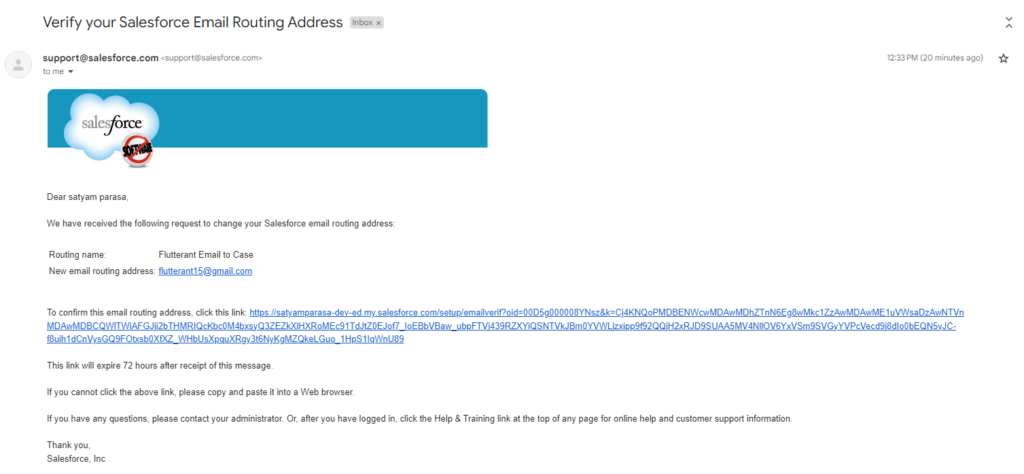
We can confirm the routing address by clicking on the URL sent to us by su*****@********ce.com. This link will be disabled 72 hours after you get this message.
On the Email-to-Case Routing Address tab, we can also send a new verification link by clicking on the “Verify” button next to the routing address.
Once verification is done, return back to the Setup Email-to-Case page. Notice that Salesforce generated an email service address for your route address in the route Addresses section.
For example, Here, I provided fl**********@***il.com as my email address, Salesforce produced the following Email Services Address:
fl**********@***********************************************************************************ce.com
Salesforce generates a distinct domain-part for each email service address to ensure that no two email service addresses are identical. The produced domain part is shown to the right of the Email Address.
Email System Forwarding with Email-to-Case
When we use the same email address for Sandboxes and Prod, we should use the Email forwarding mechanism. If your customers use an email address (fl**********@***il.com) instead of a long address, cases will be created in PROD rather than Sandboxes. We could resolve this problem by using an email forwarding system. As a result, users can access the same address for testing as well.
I’m using Gmail as an email service provider for my Org.
- Log into Gmail and click on the settings icon
- Go to the Forwarding and POP/IMAP tab.
- After that, click the “Add a forwarding address” Tab.
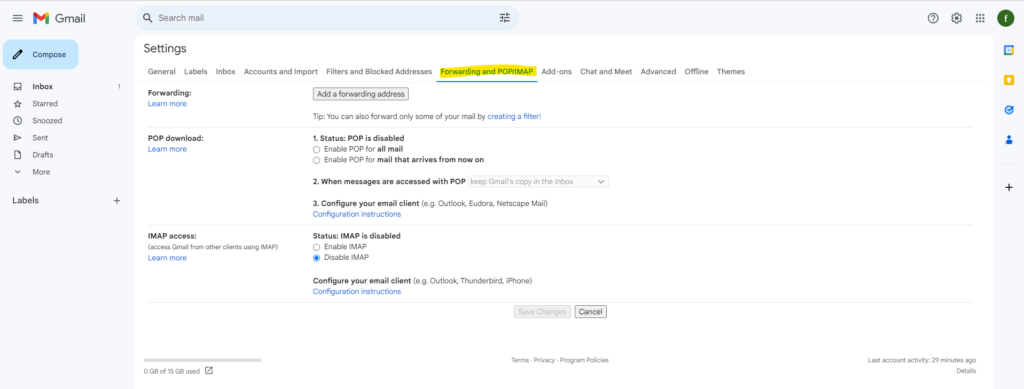
- Now add a long address (Email Services Address) as a forwarding address by clicking on the button “add a forwarding address” button.
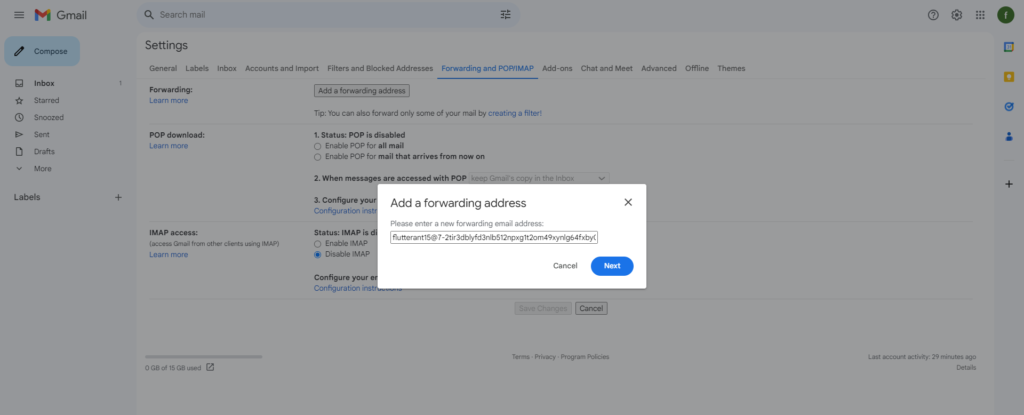
- Once you’ve entered your email address. It will display a confirmation page stating that the email is being forwarded to the long email address
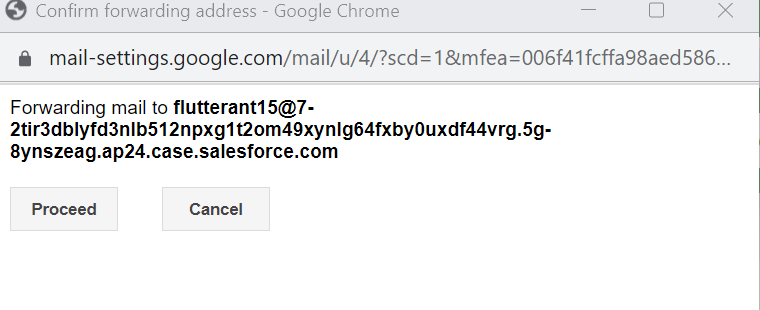
- When we click on the process button a Gmail team will send a verification code to the Salesforce Email-To-Case address. A new case will be generated Automatically, we can go to the newly created case for the confirmation code or link.
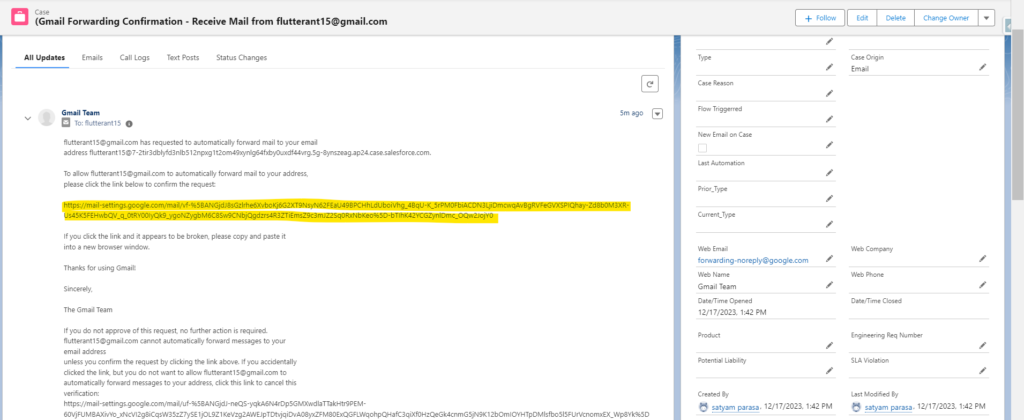
We need to open that link for confirmation and will get the Confirmation success! Message once it’s done.
Test Email to Case Functionality
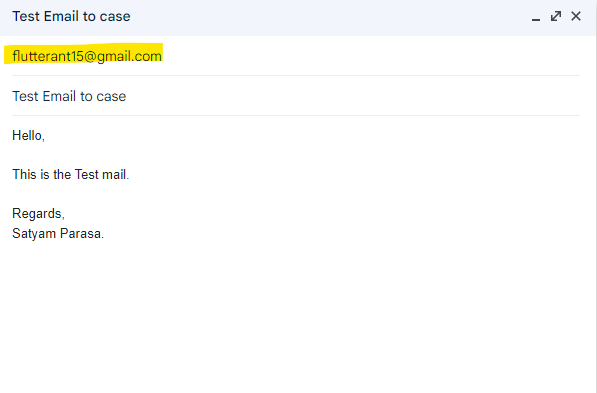
- Now is the time to Test the Email to case functionality. Let’s send an email to “fl**********@***il.com” and see what happens.
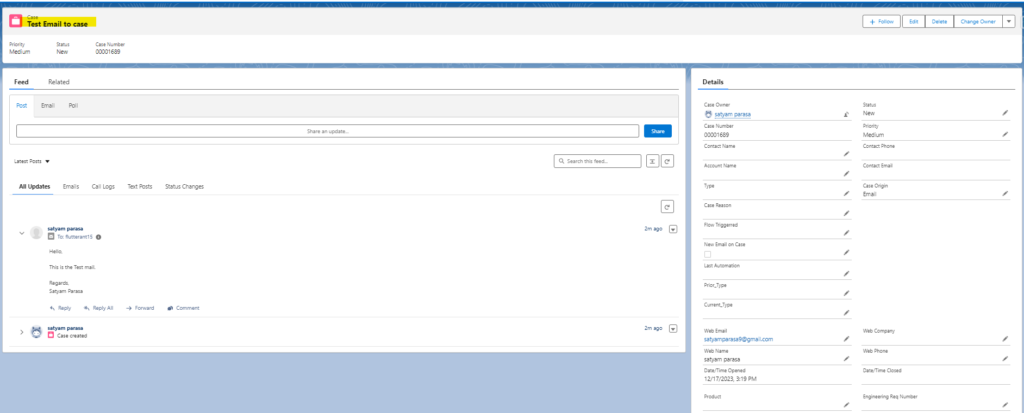
- Now check in the Salesforce cases for a new case record. The case was created from a new email. This shows that the Email to Case setup for our customer address has been completed successfully.
This is all about the Email to Case setup. In the upcoming articles, we will go into further detail about Email to case in salesforce. You can refer salesforce doc for more details

1 thought on “Email to Case in Salesforce”