As we are all aware The significance of a flashlight on a mobile phone It’s one of our phone’s most valuable accessories; we can use it as a helpful flashlight to get through the night, and it can also be utilized to capture photographs with the necessary lighting. In this quick tutorial, we are going to learn about controlling the Camera Flashlight with flutter.
We have a package named torch_light available in pub.dev to work with a flashlight.
Import library into our dart code
import 'package:torch_light/torch_light.dart';Check the device has a torch
The following snippet is used to check the torch availability on devices
try {
  final isTorchAvailable = await TorchLight.isTorchAvailable();
} on Exception catch (_) {
  // Handle error
}
Enable Torch
The following method is used to enable the torch
try {
  await TorchLight.enableTorch();
} on Exception catch (_) {
  // Handle error
}
Disable Torch
The following method is used to disable the torch
try {
  await TorchLight.disableTorch();
} on Exception catch (_) {
  // Handle error
}
The basic example of turning on or off flashlight can be implemented by adding the following code into main.dart file
import 'package:flutter/cupertino.dart';
import 'package:flutter/material.dart';
import 'package:torch_light/torch_light.dart';

void main() {
  runApp(const MyApp());
}

class MyApp extends StatelessWidget {
  const MyApp({Key? key}) : super(key: key);

  // This widget is the root of your application.
  @override
  Widget build(BuildContext context) {
    return MaterialApp(
      title: 'Flutter Demo',
      theme: ThemeData(
        primarySwatch: Colors.blue,
      ),
      home: const MyHomePage(),
    );
  }
}

class MyHomePage extends StatefulWidget {
  const MyHomePage({Key? key}) : super(key: key);

  @override
  _MyHomePageState createState() => _MyHomePageState();
}

class _MyHomePageState extends State<MyHomePage> {
  @override
  Widget build(BuildContext context) {
    return Scaffold(
      appBar: AppBar(
        title: Text("Flashlight App"),
      ),
      body: Center(
        child: Column(
          mainAxisAlignment: MainAxisAlignment.center,
          children: [
            ElevatedButton(
            onPressed: () {
              _turnOnFlash(context);
            }, child: Text("Flashlight Turn ON"),),
            ElevatedButton(onPressed: () {
              _turnOffFlash(context);
            }, child: Text("Flashlight Turn OFF")),
          ],
        ),
      ),
    );
  }

  Future<void> _turnOnFlash(BuildContext context) async {
    try {
      await TorchLight.enableTorch();
    } on Exception catch (_) {
      _showErrorMes('Could not enable Flashlight', context);
    }
  }

  Future<void> _turnOffFlash(BuildContext context) async {
    try {
      await TorchLight.disableTorch();
    } on Exception catch (_) {
      _showErrorMes('Could not enable Flashlight', context);
    }
  }
  void _showErrorMes(String mes, BuildContext context) {
    ScaffoldMessenger.of(context)
        .showSnackBar(SnackBar(content: Text(mes)));
  }
}
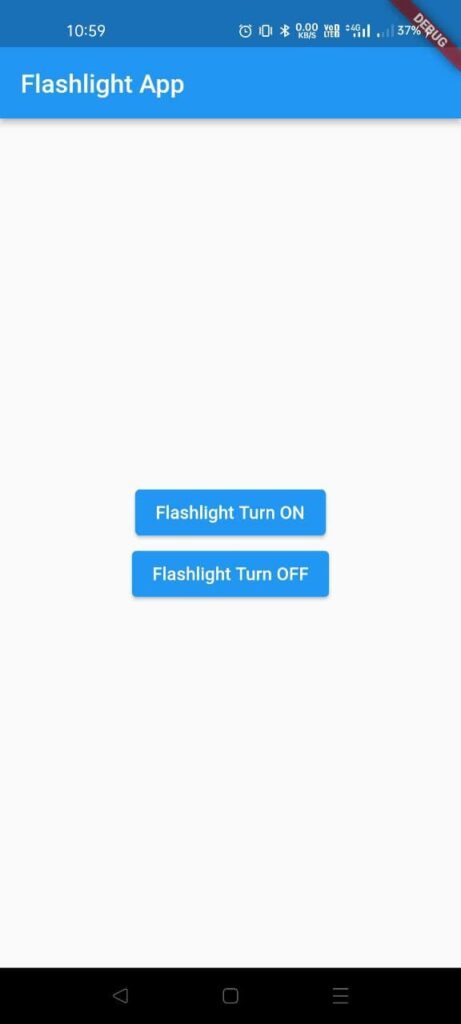
If we look at the code above, we will notice that we included two buttons for turning on and off the flashlight. The respect method will be called when you click the button. If there is a run-time error, the snack bar widget will display it.
The following image shows the Ui
For more information click here
Thanks for Reading… 🙂
