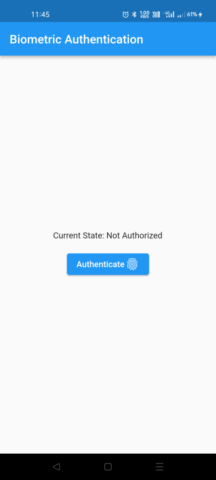
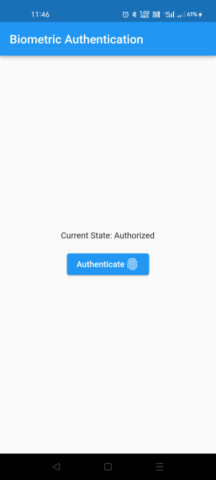
Biometric authentication is when the user’s fingerprints, facial patterns, and voice are used to verify their identity. Biometric authentication can now be found in almost every phone. Instead of typing a password, we can just authenticate by tap the fingerprint. In this article, we’ll look into how to implement Fingerprint Authentication in flutter apps
About local_aut
This Flutter plugin allows us to perform user authentication locally, on-device.
The canCheckBiometrics method is used to determine whether or not local authentication is supported on the device.
bool canCheckBiometrics =
    await localAuth.canCheckBiometrics;
The following biometric types are currently in use:
- BiometricType.face
- BiometricType.fingerprint
getAvailableBiometrics method is used to get the list of enrolled biometrics.
List<BiometricType> availableBiometrics =
    await auth.getAvailableBiometrics();
In the returned list may contain the possibilities of BiometricType.face, BiometricType.fingerprint, and BiometricType.iris (not yet implemented).
Let’s have a deeper look at the authenticate() method, which uses biometric authentication.
  Future<bool> authenticate({
    required String localizedReason,
    bool useErrorDialogs = true,
    bool stickyAuth = false,
    AndroidAuthMessages androidAuthStrings = const AndroidAuthMessages(),
    IOSAuthMessages iOSAuthStrings = const IOSAuthMessages(),
    bool sensitiveTransaction = true,
    bool biometricOnly = false,
  })
String localizedReason: This parameter allows the user to get a message when being promoted for authentication. For example message as ‘Please scan your fingerprint to access MyApp’. It can not be empty.
bool useErrorDialogs: If True is set, the system will handle any issues that arise during the authentication process. For example, If a fingerprint reader is present on the phone but no fingerprint is registered, the plugin will try to direct the user to the settings to add one. Any issue that cannot be resolved by the user, such as the lack of a biometric sensor on the device, will be returned as a [PlatformException].
If we don’t want to use error dialogues by default, we can simply set the useErrorDialogs = false. However, we must deal with the error message that is thrown during authentication.
AndroidAuthMessages androidAuthStrings: Using the constructors [AndroidAuthStrings] and [IOSAuthStrings], we can customize the messages in the dialogs. We can have an idea by looking at the code snippets below.
    const errorString = const AndroidAuthMessages(
        signInTitle: "Login to Home page",
        cancelButton: 'cancel',
        goToSettingsButton: 'settings',
        goToSettingsDescription: 'Please register your Fingerprint');
     authenticated = await auth.authenticate(
          localizedReason: 'Let OS determine authentication method',
          useErrorDialogs: false,
          androidAuthStrings: errorString);
bool stickyAuth: When an application goes into the background for whatever reason while authentication is in progress, [stickyAuth] is used. Authentication must be halted at that point for security reasons. If stickyAuth is set to true, when the app is restarted, authentication is continued. If it is set to false (the default), a failure message is sent back to Dart as soon as the app is halted.
bool sensitiveTransaction: When [sensitiveTransaction] is set to true, platform-specific safeguards are enabled. For example, after recognizing the user’s face, Android displays a confirmation window to ensure that the user wants to unlock their phone.
bool biometricOnly: When [biometricOnly] is set to true, non-biometric local authentication methods such as pin, passcode, and passcode are disabled.
we can disable the local authentication in android manually
void _cancelAuthentication() {
    localAuth.stopAuthentication();
}
Implementation of Biometric Authentication
Prerequisites:
- local_auth package
- Any IDE (Android studio or VS code)
- Device with fingerprint sensor
Project setup:
- Create a new flutter project in your favorite IDE, and remove the boilerplate code. Ref link
- Add the local_auth dependency in pubspec.yaml file, and install it by running pub get.
dependencies:
  flutter:
    sdk: flutter
  local_auth: ^1.1.8
3. Instead of using FlutterActivity in the manifest file, we must use Flutter FragmentActivity.
Update mainactivity.java:
import android.os.Bundle;
import io.flutter.app.FlutterFragmentActivity;
import io.flutter.plugins.flutter_plugin_android_lifecycle.FlutterAndroidLifecyclePlugin;
import io.flutter.plugins.localauth.LocalAuthPlugin;

public class MainActivity extends FlutterFragmentActivity {
    @Override
    protected void onCreate(Bundle savedInstanceState) {
        super.onCreate(savedInstanceState);
        FlutterAndroidLifecyclePlugin.registerWith(
                registrarFor(
                        "io.flutter.plugins.flutter_plugin_android_lifecycle.FlutterAndroidLifecyclePlugin"));
        LocalAuthPlugin.registerWith(registrarFor("io.flutter.plugins.localauth.LocalAuthPlugin"));
    }
}
Or Update MainActivity.kt:
import io.flutter.embedding.android.FlutterFragmentActivity
import io.flutter.embedding.engine.FlutterEngine
import io.flutter.plugins.GeneratedPluginRegistrant

class MainActivity: FlutterFragmentActivity() {
    override fun configureFlutterEngine(flutterEngine: FlutterEngine) {
        GeneratedPluginRegistrant.registerWith(flutterEngine)
    }
}
4. USE_FINGERPRINT permissions should be added to the android manifest file.
<manifest xmlns:android="http://schemas.android.com/apk/res/android"
          package="com.example.app">
  <uses-permission android:name="android.permission.USE_FINGERPRINT"/>
<manifest>
5. And Add the following code into the main.dart file
import 'dart:async';

import 'package:flutter/material.dart';
import 'package:flutter/services.dart';
import 'package:local_auth/local_auth.dart';

void main() {
  runApp(MyApp());
}
//flutterant - Biometric Authentication
class MyApp extends StatefulWidget {
  @override
  _MyAppState createState() => _MyAppState();
}

class _MyAppState extends State<MyApp> {
  final LocalAuthentication auth = LocalAuthentication();

  String _authorized = 'Not Authorized';
  bool _isAuthenticating = false;

  Future<void> _authenticate() async {
    bool authenticated = false;
    try {
      setState(() {
        _isAuthenticating = true;
        _authorized = 'Authenticating';
      });
      authenticated = await auth.authenticate(
          localizedReason: 'Let OS determine authentication method',
          useErrorDialogs: true,
          stickyAuth: true);
      setState(() {
        _isAuthenticating = false;
      });
    } on PlatformException catch (e) {
      print(e);
      setState(() {
        _isAuthenticating = false;
        _authorized = "Error - ${e.message}";
      });
      return;
    }
    if (!mounted) return;

    setState(
        () => _authorized = authenticated ? 'Authorized' : 'Not Authorized');
  }

  void _cancelAuthentication() async {
    await auth.stopAuthentication();
    setState(() => _isAuthenticating = false);
  }
//flutterant - Biometric Authentication
  @override
  Widget build(BuildContext context) {
    return MaterialApp(
      debugShowCheckedModeBanner: false,
      home: Scaffold(
        appBar: AppBar(
          title: const Text('Biometric Authentication'),
        ),
        body: Center(
          child: Column(
            mainAxisAlignment: MainAxisAlignment.center,
            children: [
              Text('Current State: $_authorized\n'),
              (_isAuthenticating)
                  ? ElevatedButton(
                      onPressed: _cancelAuthentication,
                      child: Row(
                        mainAxisSize: MainAxisSize.min,
                        children: [
                          Text("Cancel Authentication"),
                          Icon(Icons.cancel),
                        ],
                      ),
                    )
                  : Column(
                      children: [
                        ElevatedButton(
                          child: Row(
                            mainAxisSize: MainAxisSize.min,
                            children: [
                              Text('Authenticate'),
                              Icon(Icons.fingerprint),
                            ],
                          ),
                          onPressed: _authenticate,
                        ),
                      ],
                    ),
            ],
          ),
        ),
      ),
    );
  }
}
//flutterant - Biometric Authentication
6. Implementation part has been done, let’s run the application and see the output
Thanks for reading !!! 🙂

