In this article, we are going to learn about how to create a Flutter application in Android studio. These are the steps to follow.
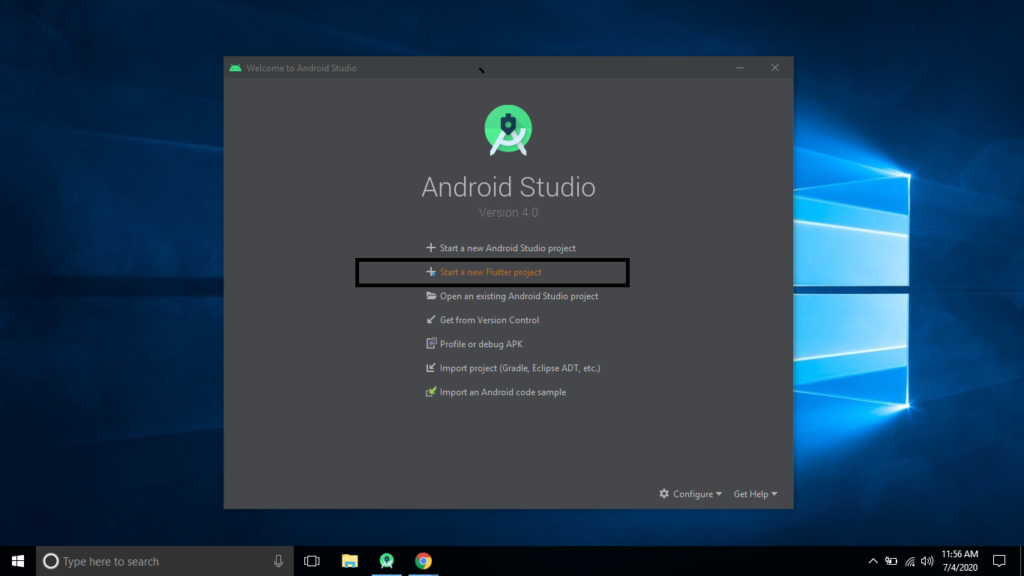
1. Open the Android studio
2. Select Start a new Flutter project or go to the File → New → New Flutter Project
3. Select Flutter Application as the project type. Then click Next.

4. Configure the application details as shown below and then click Next
Project name: Give your application name.It must be written in lower case & contain underscores. For example, Ex: first_flutter_app
Flutter SDK path: Verify the Flutter SDK path specifies the SDK’s location (select Install SDK… if the text field is blank).
Project location: Give your project location
Description: Here we can add a description of the project

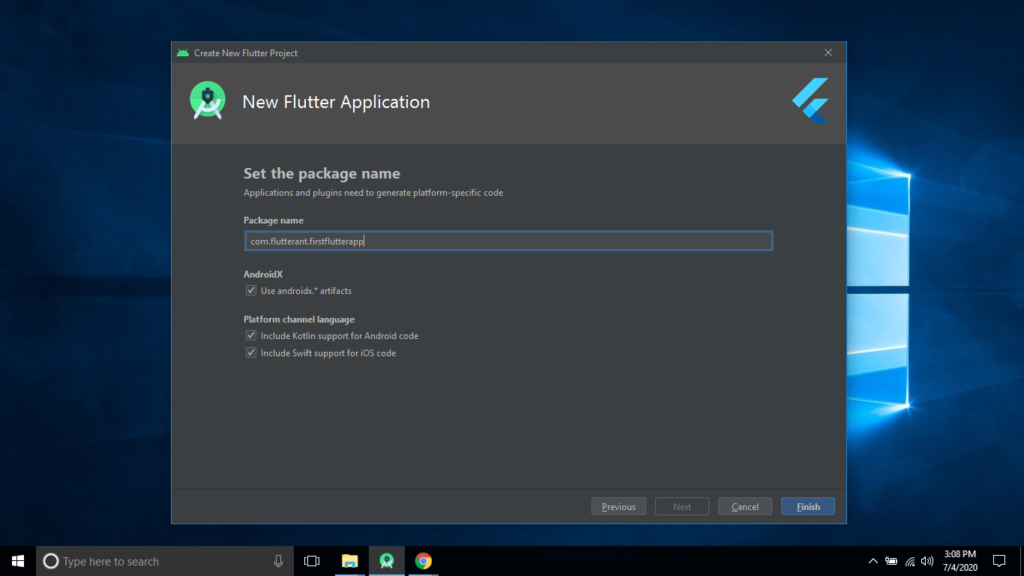
5. Then give your package name and click on the Finish button
Note: While creating a new project, some Flutter IDE plugins ask for a company domain name in reverse order as a com.flutterant. The domain name and project name are used together as the package name (Ex: com.flutterant.firstflutterapp) for Android and Bundle ID for iOS when the app is released. Make sure the package name is Unique because it can’t be changed once the app is released.
6. Finally, wait for some time Android studio will create a project with minimal functionality (Counter app), and later we can remove and add our code.
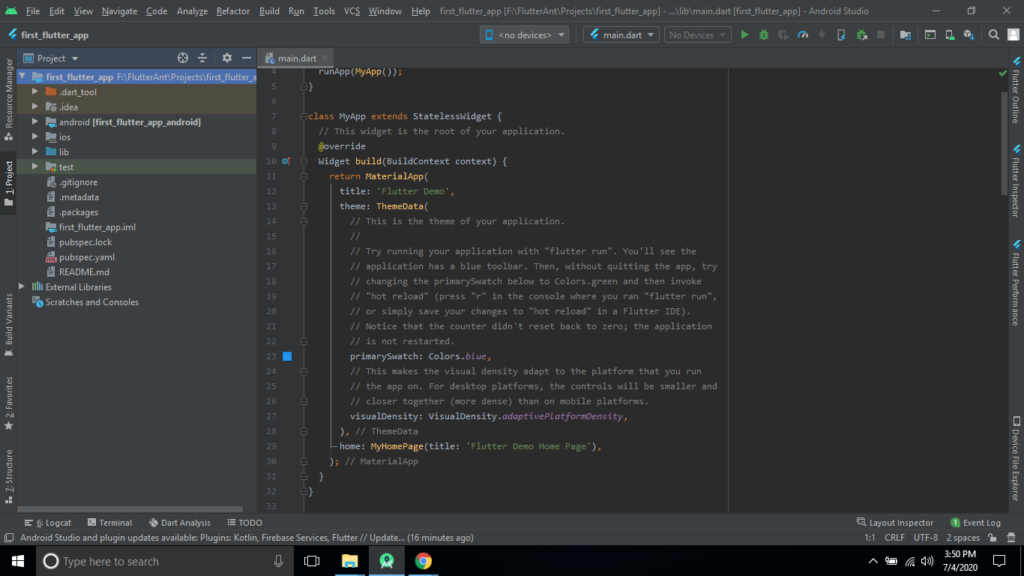
7. Now, Understand the Futter project structure and its purposes

.dart_tool: The .dart_tool directory has a package_config.json file which is a JSON formatted text file to declare a number of packages with a root and a package URI root directory for each. The SDK version for the specific packages is added as an extra language version property on the JSON object for the package. This file is generated automatically by the pub tool.
.idea: This folder is autogenerated which contains project configuration files for dart SDK, packages and so on all are in XML format. Basically, we will never touch this directory.
android: This folder contains all packages and files which are related to Android. We need to work on this folder when if we get any specific requirements to implement in native(Android). Here, we will use the AndroidManifest.xml file regularly.
ios: This folder contains all packages and files which are related to iOS. We need to work on this folder when if we get any specific requirements to implement in native (iOS). Here, we will use the Info.plist file regularly.
lib: This folder is crucial since it contains the Dart files that contain the code for our flutter application. The default and entry file for our flutter application is main.dart.
test: This folder will be used for testing our application
.gitignore: It is a Git version control file in the format of Text. Containing a list of files, folders, extensions, and so on and should be ignored in the project.
.metadata: This file keeps track of our project’s properties. This file should be version controlled and should not be modified by hand.
.packages: This file maintains a complete list of dependencies in our project.
first_flutter_app.iml: This file has the same name as our project, but it has an iml extension and contains additional project parameters. It should not be manually modified.
pubspec.lock: It’s a file that’s generated automatically from the .yaml file. It contains further information about all dependencies.
pubspec.yaml: It is a crucial file for our project. It contains information such as the project name, project description, project SDK version information, dependencies, and assets, among other things.
README.md: This file describes the information about our project. we can share the information with the developers by editing this file.
8. Now, Open main.dart file replaces default code with the following code.
// Flutter application in Android studio -flutterant

import 'package:flutter/material.dart';

void main() => runApp(MyApp());

class MyApp extends StatelessWidget {
  // This widget is the root of your application.
  @override
  Widget build(BuildContext context) {
    return MaterialApp(
      title: ' Flutter application Demo',
      theme: ThemeData(
        // This is the theme of your application.
        // Try running your application with "flutter run". You'll see the
        // application has a blue toolbar. Then, without quitting the app, try
        // changing the primarySwatch below to Colors.green and then invoke
        // "hot reload" (press "r" in the console where you ran "flutter run",
        // or simply save your changes to "hot reload" in a Flutter IDE).
        // Flutter application in Android studio -flutterant
         // Flutter application in Android studio -flutterant

        primarySwatch: Colors.blue,
        visualDensity: VisualDensity.adaptivePlatformDensity,
      ),
      home: MyHomePage(),
    );
  }
}
// Flutter application in Android studio -flutterant
class MyHomePage extends StatelessWidget {
  @override
  Widget build(BuildContext context) {
    return Scaffold(
      appBar: AppBar(
        title: Text("Flutter App Demo"),
      ),
      body: Center(

          child: Text("My First Flutter app")),
    );
  }
}

//Flutter application in Android studio - flutterant
// Flutter application in Android studio -flutterant
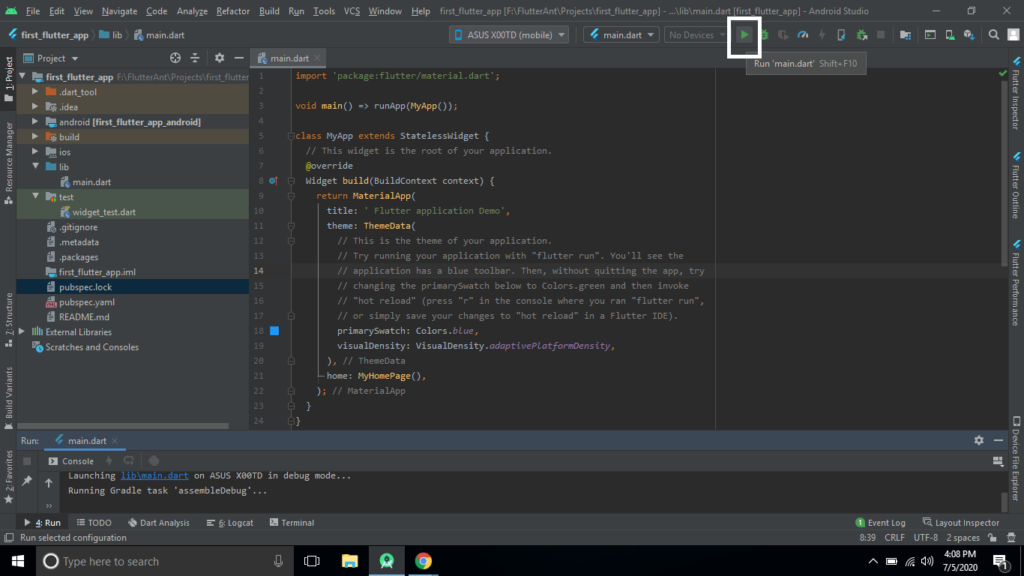
9. Now, Run the application by clicking on the Play button as shown in the below screen.
10. Finally, as shown below, we will get the following output.
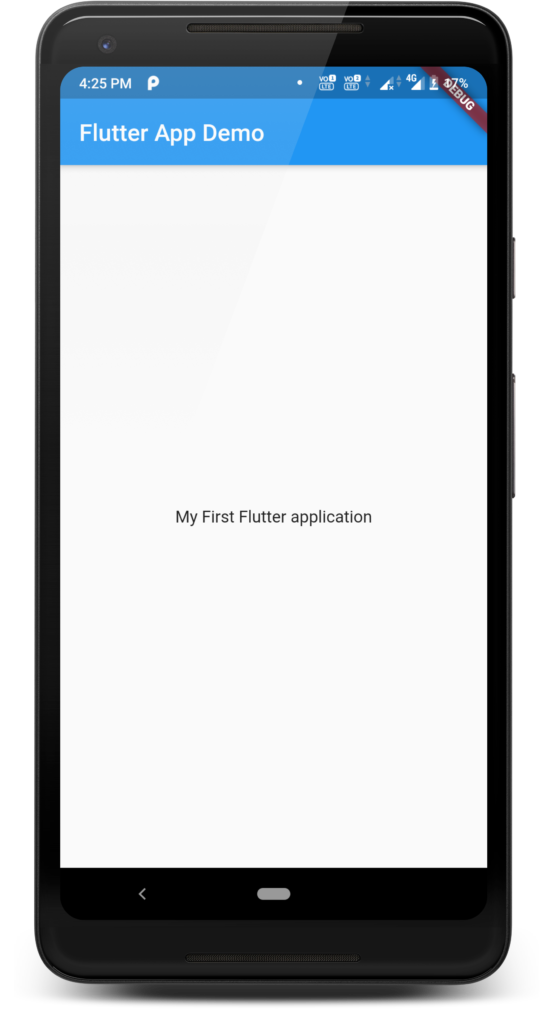
That’s all about creating the Flutter application in Android studio.
ForInformation about creating a flutter application click here
Thanks for reading … 🙂

Great work bro
Wow, this post is nice, my sister is analyzing such things,
therefore I am going to convey her.