In this article, we are going to learn about the installation of flutter in windows. The installation of flutter is not much difficult, follow the steps to get to know
System Requirements
Operating system: Windows 7 or above (64bit)
Disk space: 400MB (Not included for IDE/Tools)
Tools:
- Windows Powershell 5.0 or newer version(This is free installed with windows 10)
- Git for Windows 2. x (Here, Use Git from Windows Command Prompt option).
Download Flutter SDK
Download the latest stable release of the Flutter SDK by clicking on the below link
Flutter Latest version
Extract the zip file and place where we want to install the Flutter SDK
For example, C:\src\Flutter
Note: Do not install a Flutter in some Directories like C:\Program Files\
Another way of getting Flutter SDK:
If we don’t want to install a fixed version of the installation bundle we can skip the above steps and follow the below steps.
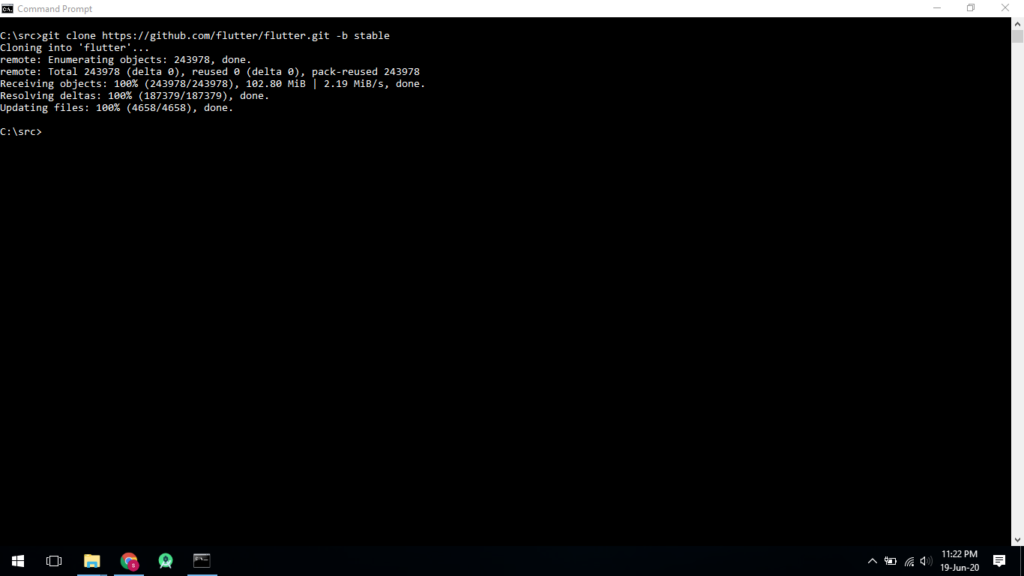
- Open the windows command prompt
- Navigate to desire location as, C:\src
- Run the command git clone https://github.com/flutter/flutter.git -b stable
Update the Path
If we want to run Flutter commands in regular windows console, we need to update the path. These are the following steps for updating.
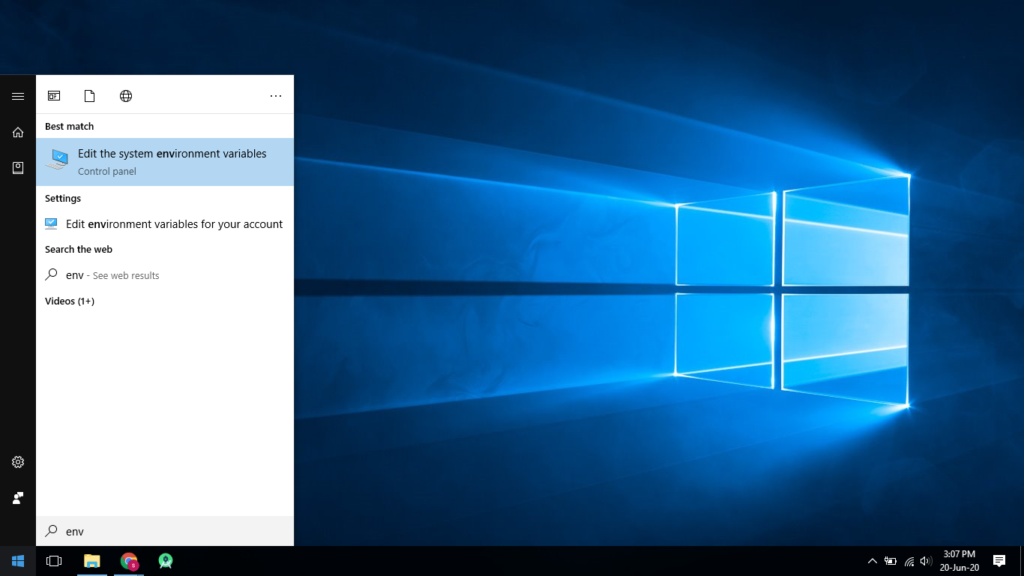
1. From the Start search bar, enter ‘env’ and select Edit environment variables for your account.
2. Under User variables check if there is an entry called Path exist or not. If the entry doesn’t exist create a new user variable named Path
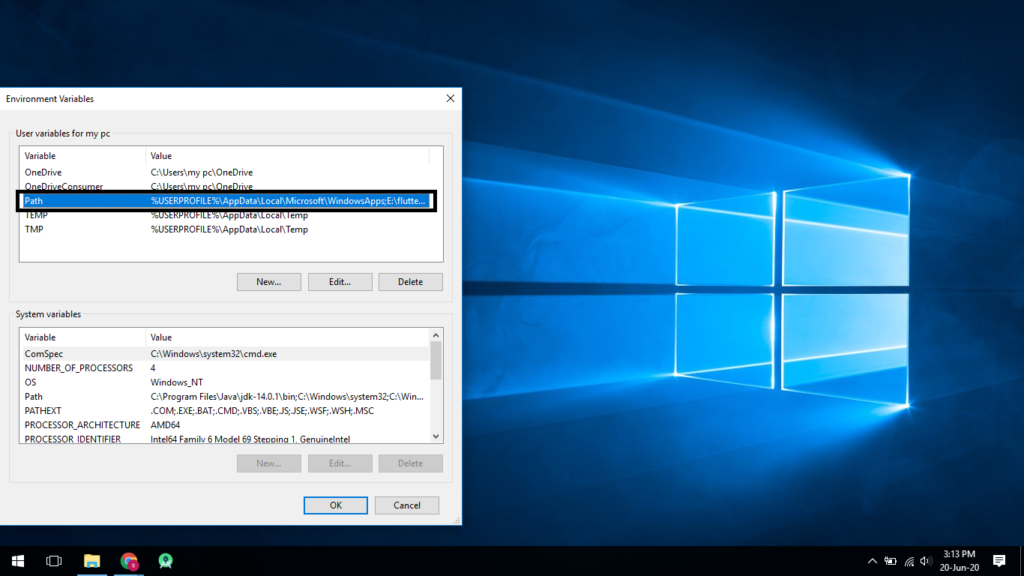
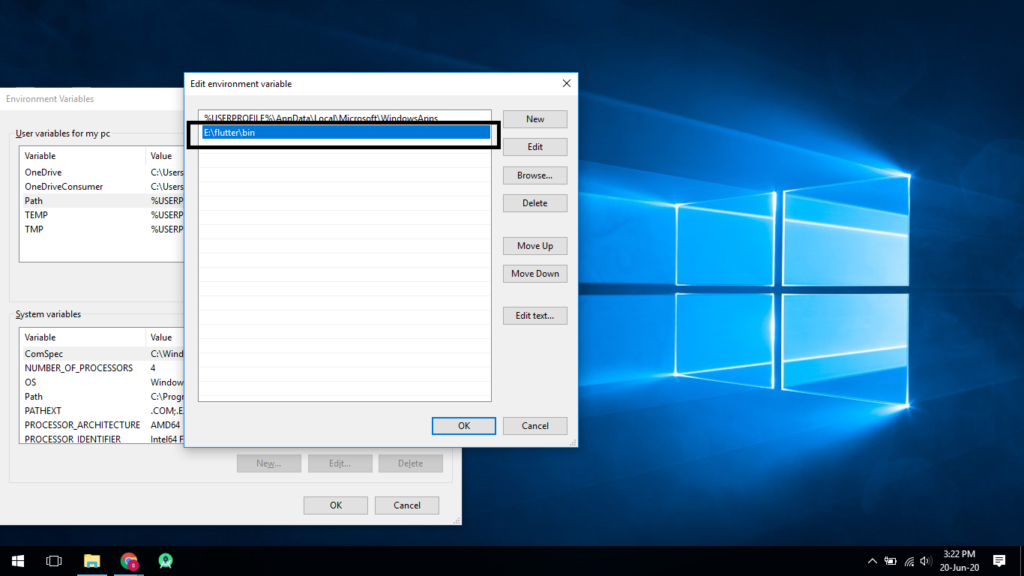
3. Now, select Path -> click on edit, the following screen will get
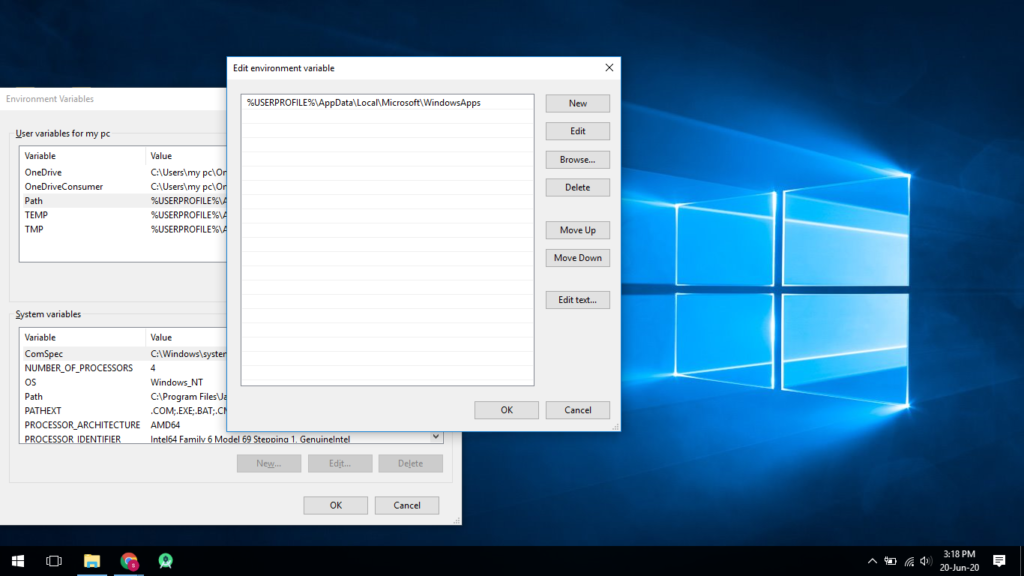
4. Click on New -> add the path of flutter bin folder and click on Ok -> Ok
5. Run Flutter Doctor:
Run the flutter doctor command in the windows console to get If there are any platform dependencies need to complete the setup.
This command checks the environment and displays a report of the status of Flutter installation. Check the output carefully for other software we might need to install or further tasks to perform (shown in bold text).
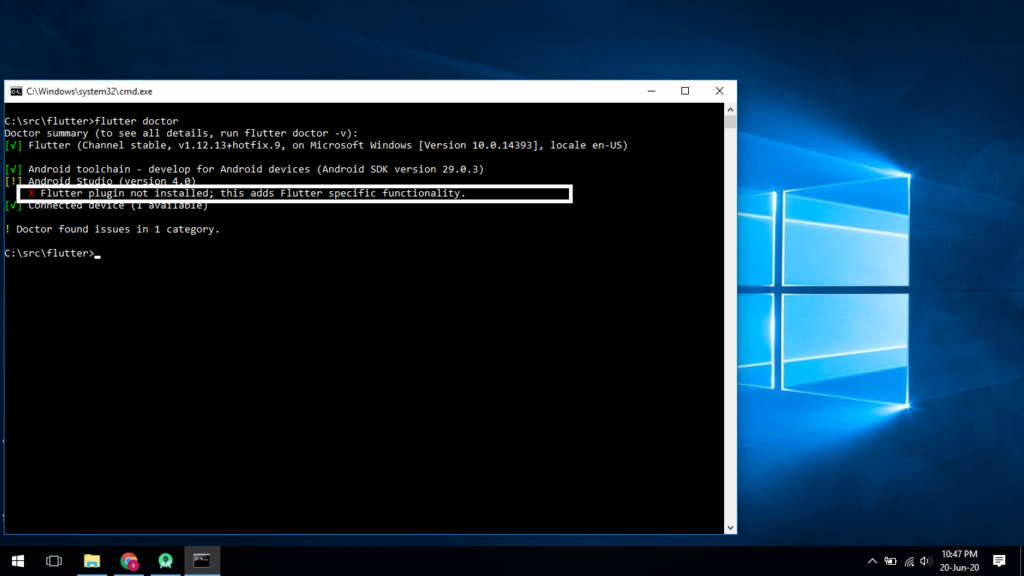
From the above screenshot, I got one issue Flutter plugin was not installed. Follow the next step to resolve the issue.
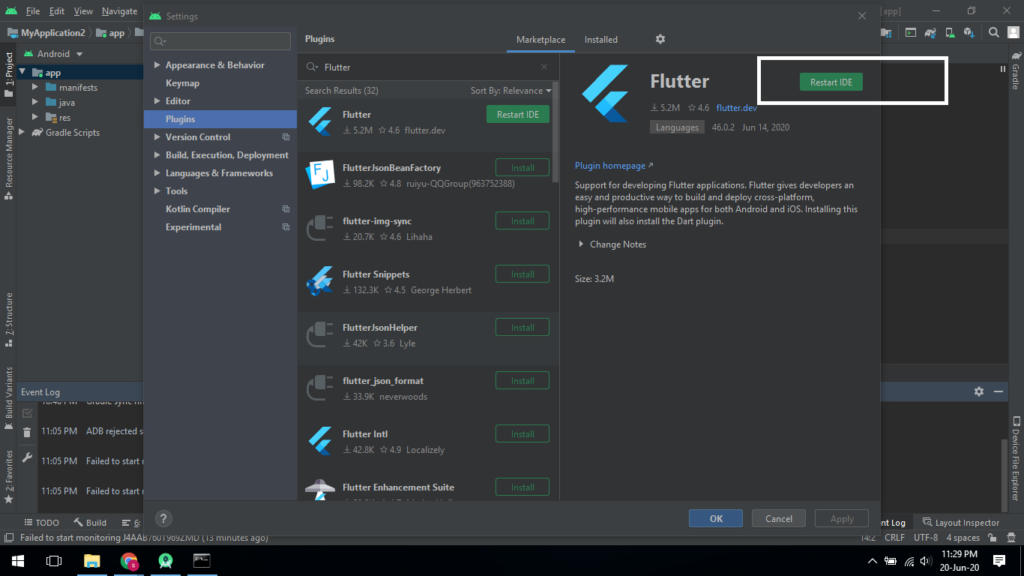
6. Installation of Flutter plugin
- Start Android studio
- Go to File -> Settings -> Plugins
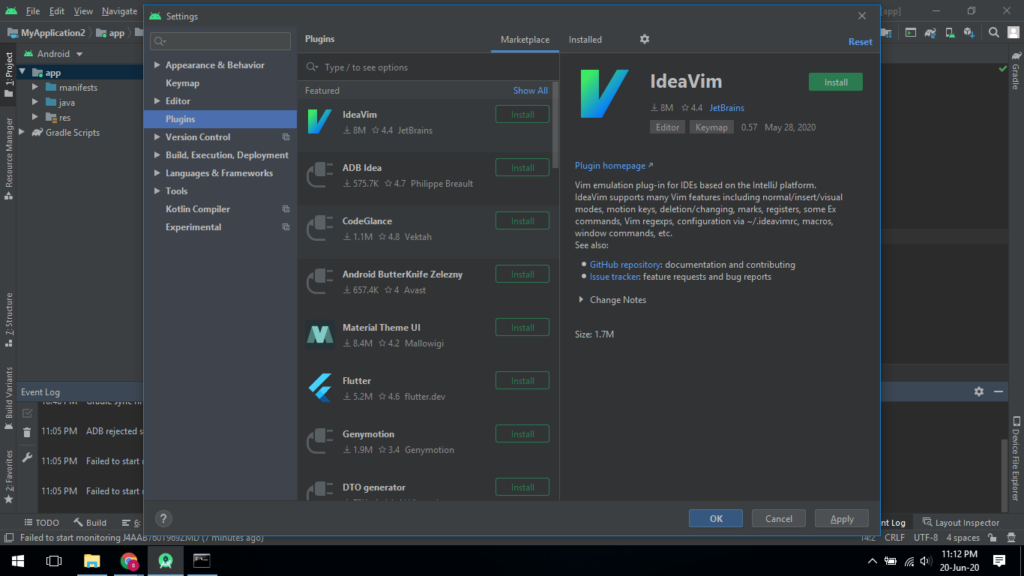
- Go to Marketplace tab -> search Flutter -> click on Install button
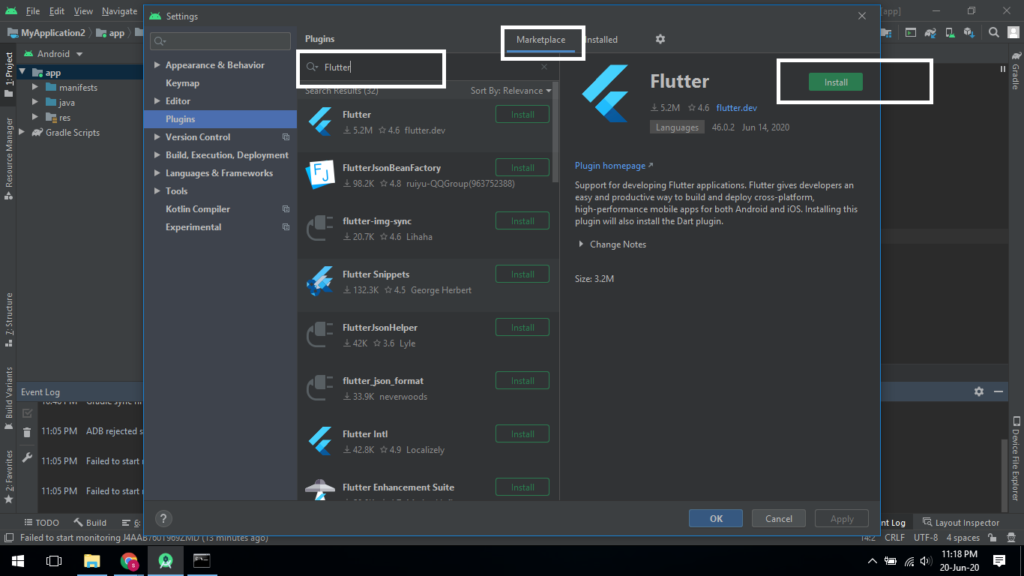
- And finally click on Restart IDE
Now, Installation of Flutter is completed, we can start Flutter apps development..!!
Here is the complete Flutter installation Video
For more reference please click here
Thanks for reading … 🙂

Nicely explained, simple language and to the point . I find this article really useful for newbies , whoever want to learn flutter technology.